
Create a Destination template
Creating Destinations is quicker and more consistent when you use a template. To create a template, follow these steps:
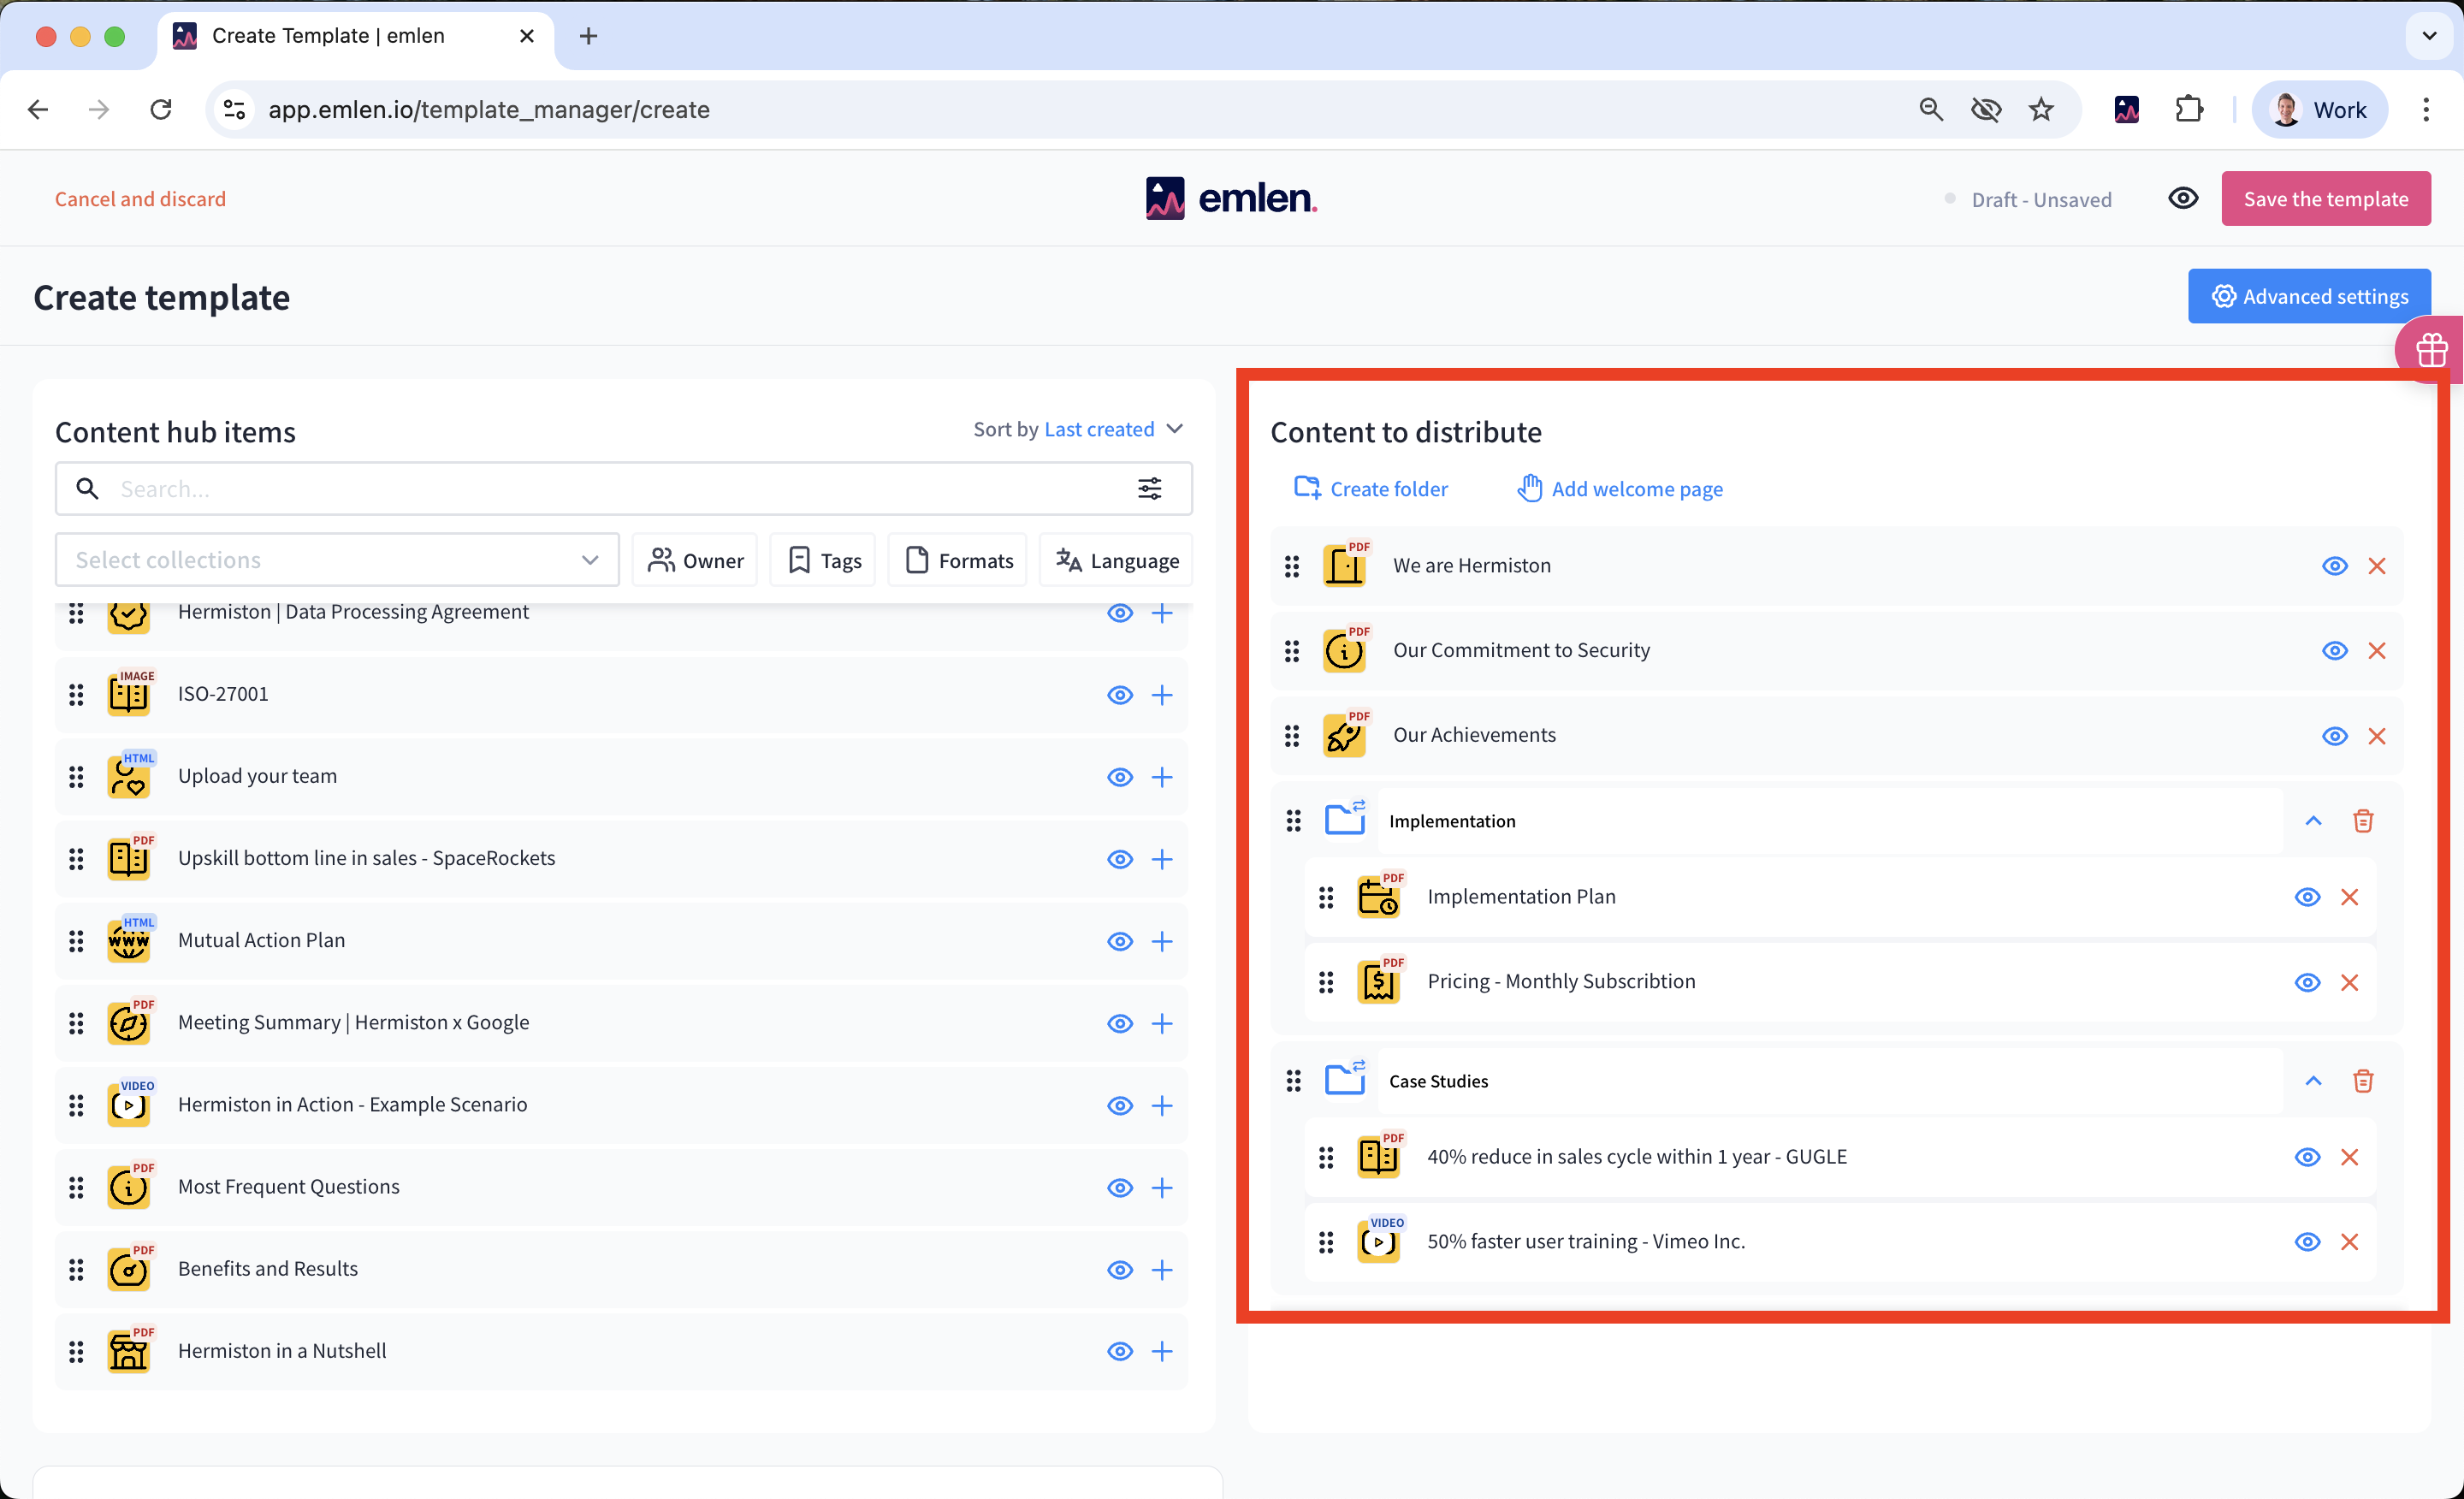
1. In the template manager, click on "Create template"
2. Select the content items you want to include from the left side
3. Create folders and drag the selected items into them
4. Add a welcome page - make it generic (no buyer logo or customer names at this stage, generic welcome video; customization will come later)

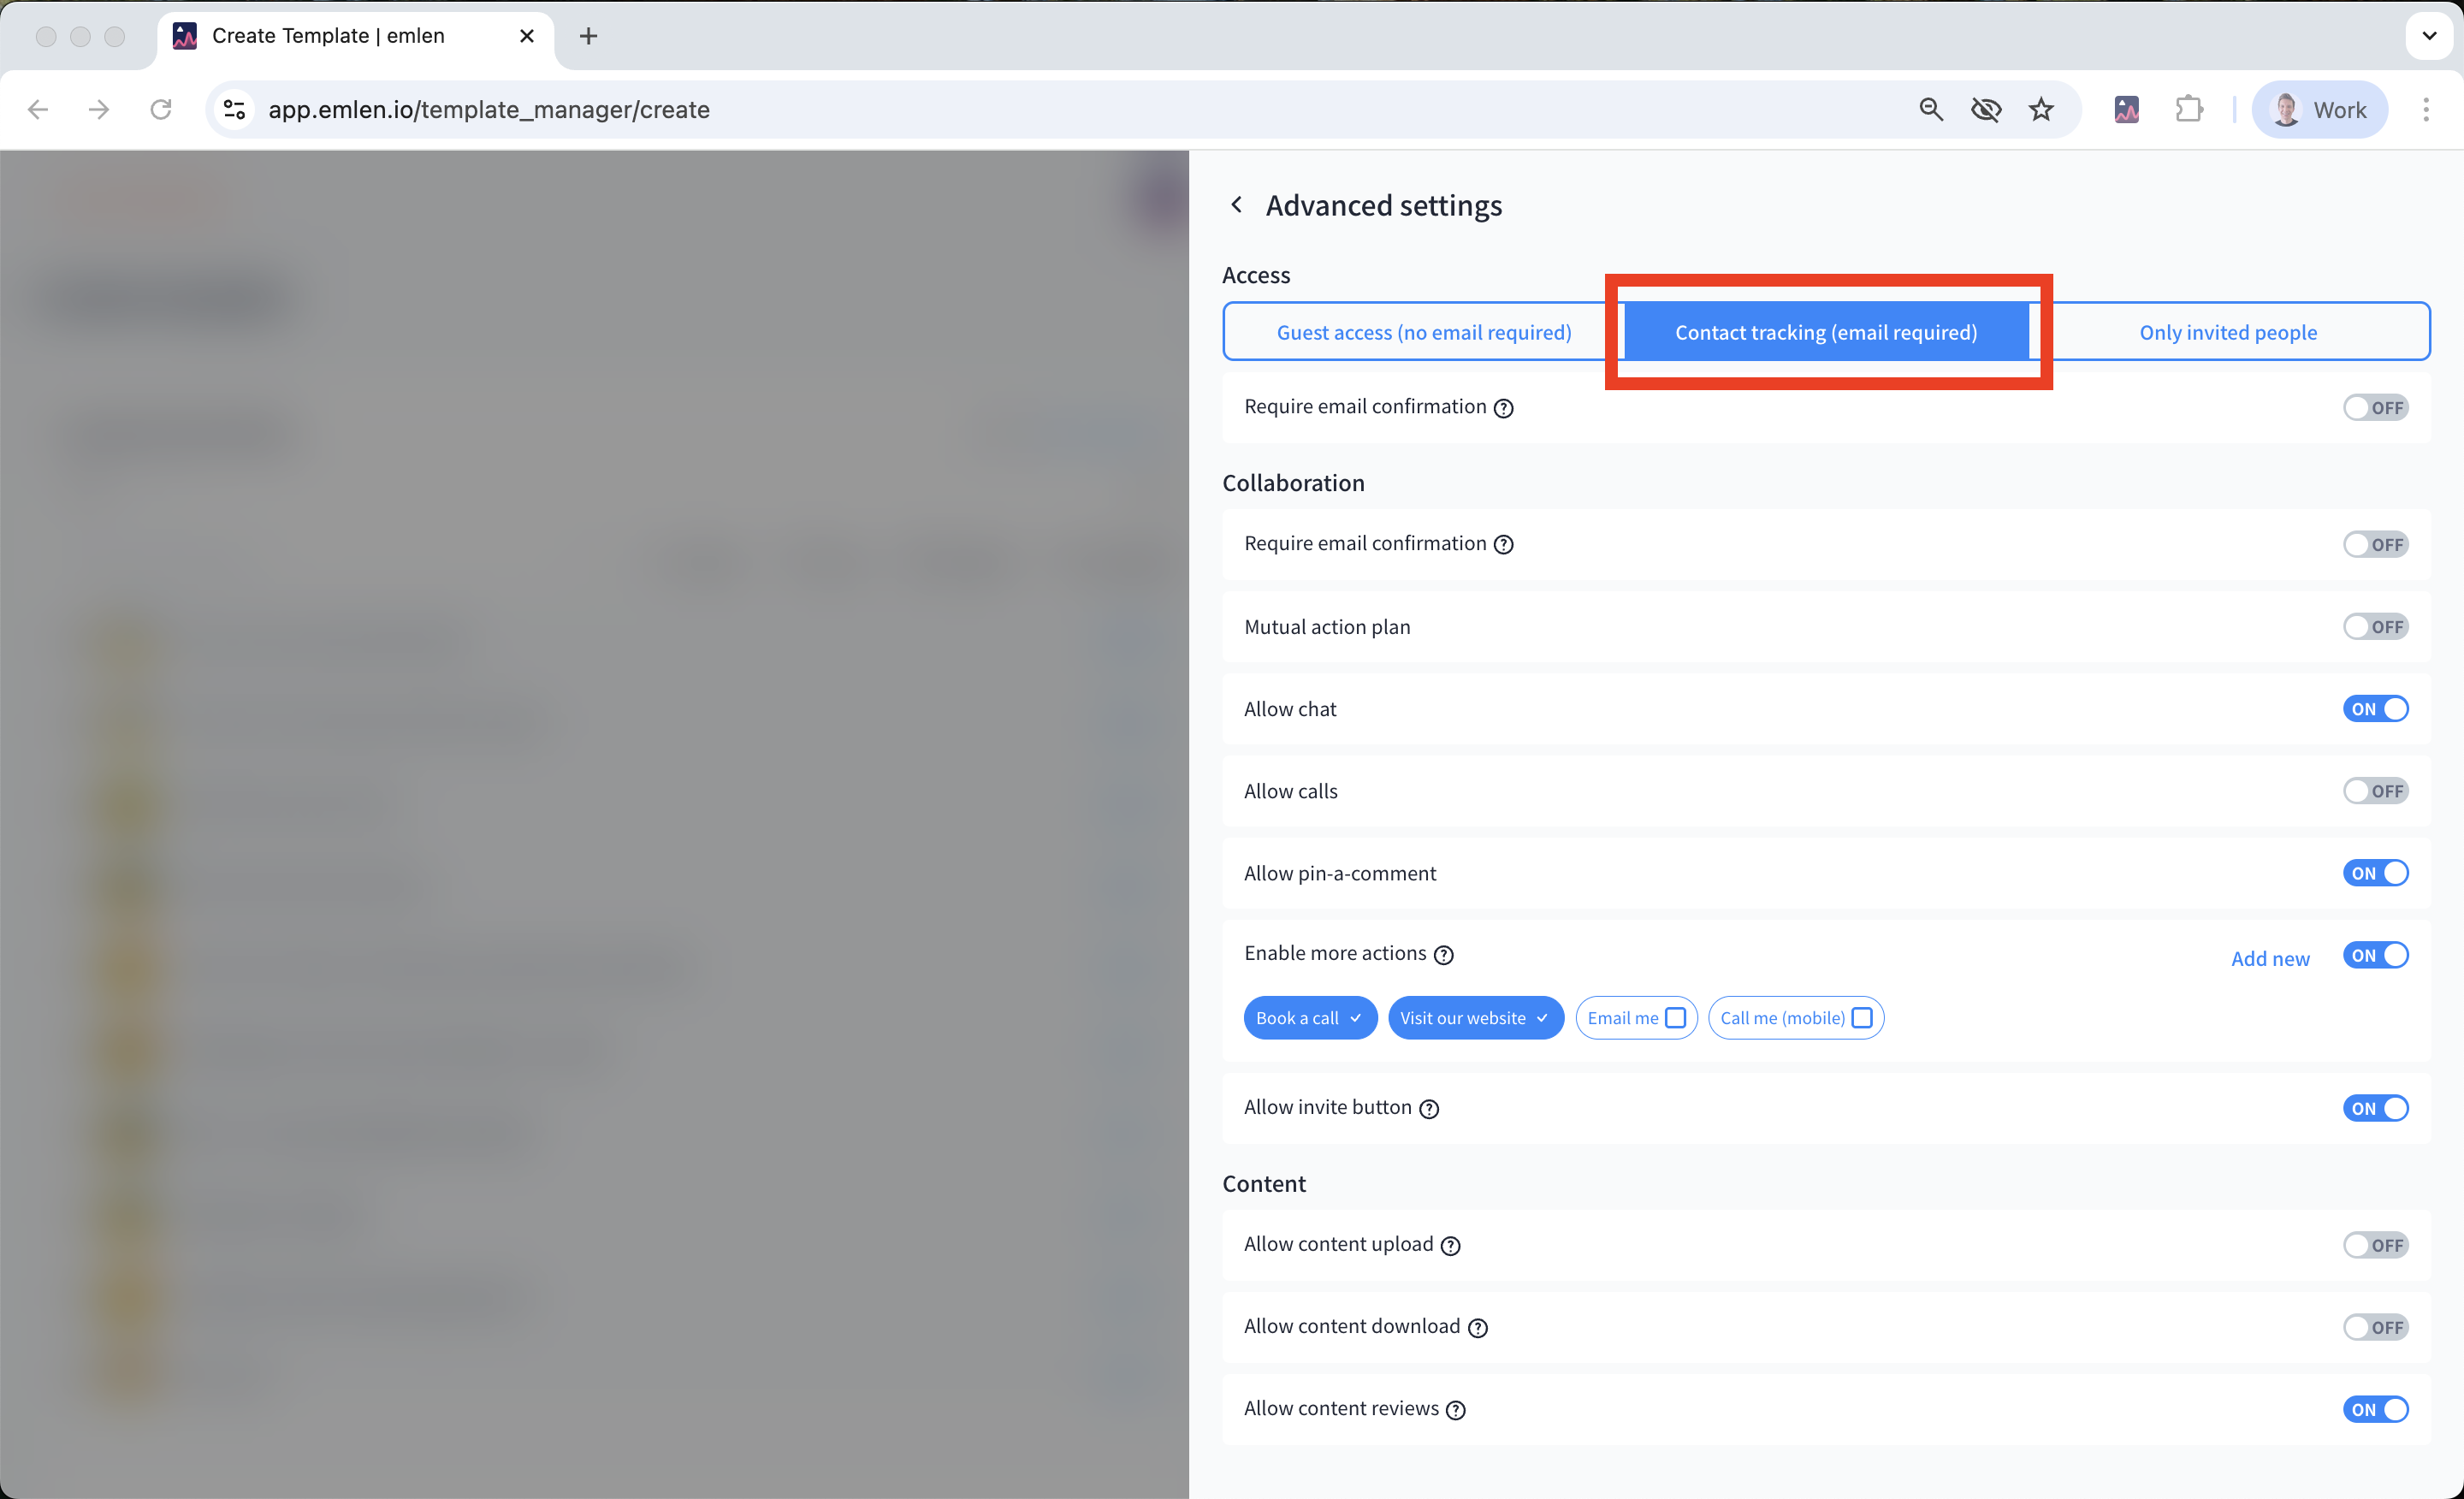
5. Open “Advanced settings” on the right and adjust the following:
Access: It is recommended to set to "Contact tracking"
- Guest access: Visitors can enter without verification, but you won’t get analytics on contact level (only guest visits)
- Contact tracking (recommended): Visitors must enter their email to access the Destination, allowing for contact-level analytics
- Only invited contacts: Only those you’ve added can enter
Collaboration: set these features as desired
- Mutual action plan: Collaborate on a To-Do list
- Chat: Directly chat with your buyers in the Destination
- Calls: Enable video calls from the chat
- Pin-a-comment: Exchange comments on PDFs
- More actions: Add or customize Call-to-Action links
- Invite button: Visitors can invite others
Content
- Content upload: Customers can upload files.
- Content download: Specify which files can be downloaded.
- Content reviews: Customers can rate shared content.
6. Close the "Advanced settings" page and click "Save the template"